Now that you’ve created your Goals, you’ll want to display on your website for your visitors to see. There are many ways to achieve this with Before & After – choose the one that’s best for you.
Option 1: Click the Before & After Button on any Page or Post, and then choose Add Goal
The Before & After button (highlighted with green below) appears above the editor widget on Posts and Pages. Simply click it, choose Add Goal, and follow the instructions in the pop-up window.

Option 2: Paste the shortcode into any page or post
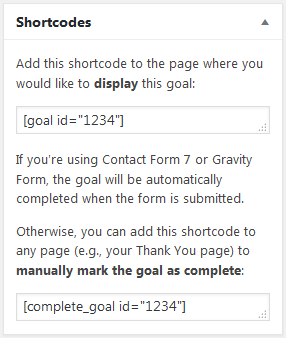
Edit any Goal, and you’ll see a Shortcodes meta box on the right hand side. Simply copy the shortcode that you see there, and paste it into any post or page where you’d like the Goal to display.
Shortcodes meta box – appears on the Add/Edit Goal screen:

Copy the [goal] shortcode, and paste it into any page or post to display the Goal:

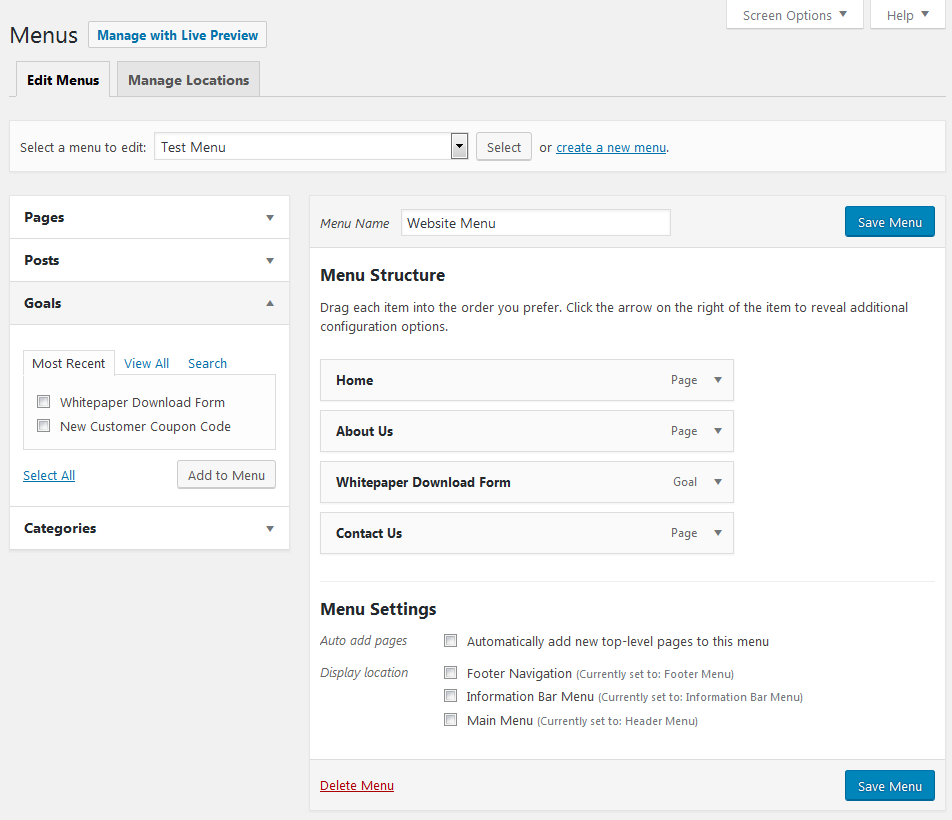
Option 3: Add the Goal to a menu using the Appearance > Menus screen
You can add a Goal directly to your menus! Just go to the Appearance > Menus area, and add your Goal to any menu just as you would a Page or Post.

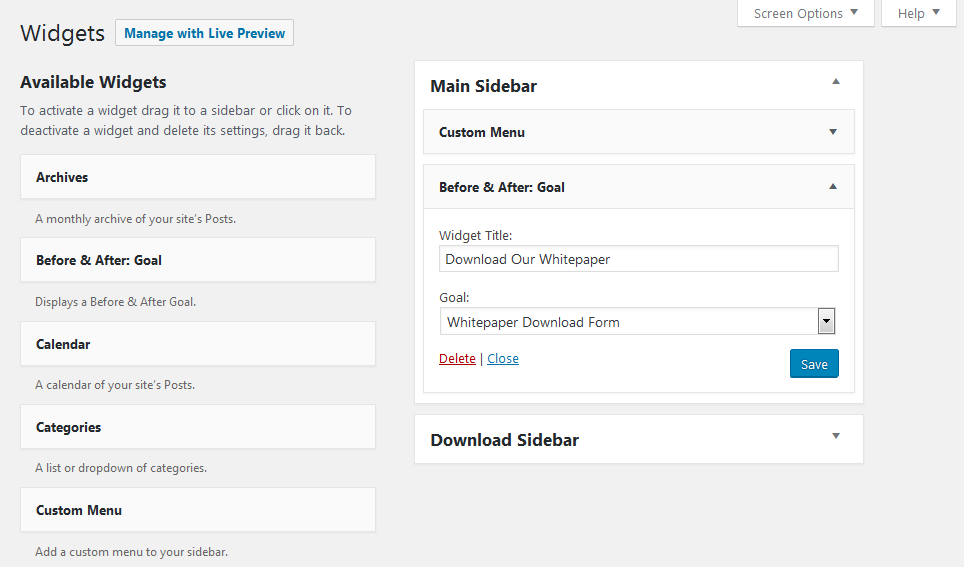
Option 4: Add the Goal widget to any sidebar or widgetized area
Control the widgets on your sidebar by visiting the Appearance > Widgets menu in WordPress. Here you’ll find the Before & After – Goal widget which you can add to any sidebar to display one of your goals. Great for mailing lists!

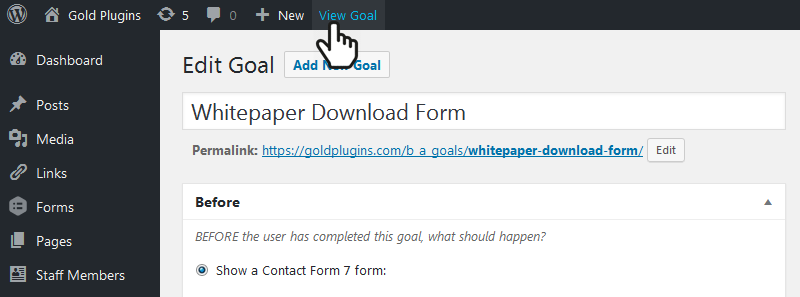
Option 5: Link to the Goal directly
To get the permalink to any Goal, simply edit the Goal, and then click the View Goal in the admin toolbar at the top of the screen.

Option 6: Output the goal in your theme using WordPress’ do_shortcode function
If you’re a developer and you’d like to output a goal inside a template, simply render the Goal shortcode using WordPress do_shortcode function.

Code from example :
<?php echo do_shortcode('the '); ?>
Option 7: Contact Support
If you’re having trouble getting your Goals to display with the methods above, please contact us and we’ll be glad to help!

