

Adding a New Testimonial with Easy Testimonials Pro is a breeze! These steps will walk you through the process.
Step 1: Visit the Add New Testimonial page

You can find this menu under Testimonials -> Add New Testimonial.
Step 2: Fill out your Testimonial content
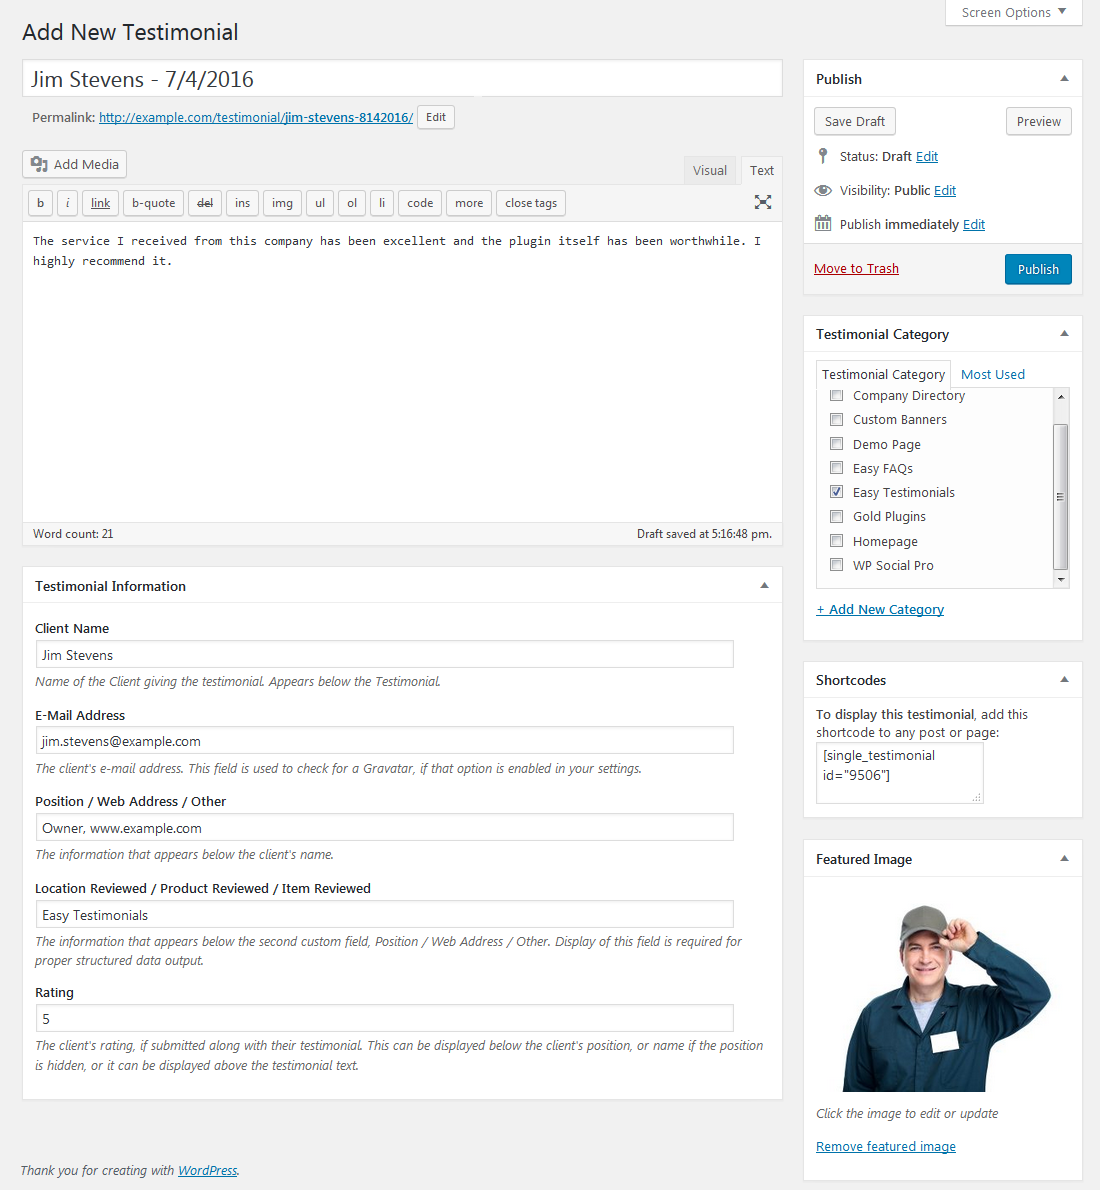
Here is a quick overview of some of the more important fields. You can edit this testimonial later and change these fields at any time.
- Testimonial Title: can be displayed with your testimonials, or it can be for your own use only.
- Testimonial Body: the quote from your customer. This can contain HTML.
- Client Name: the name of the person or organization providing the testimonial.
- Position / Location / Other: displayed under the client’s name, and provides context to the person leaving the testimonial. This could be their business name (e.g., Dunder Mifflin), their title (e.g., Assistant to the Regional Sales Manager), their Location (e.g., Scranton, PA), or another choice you make (e.g., Long Time Customer).
- Location / Product Reviewed: The product or service the Testimonial describes. Will match the itemReviewed Schema. This field is optional.
- Rating: From 1 to 5, 5 being the highest.
- Featured Image: shown to the left of the testimonial, as a 50px by 50px thumbnail by default (more sizes available in Pro).
- Testimonial Category (sidebar): useful for grouping and organizing your Testimonials. Can be used to show a selected group of testimonials on a page or in a widget. Testimonials can belong to more than one category.
When you’ve filled out all the fields you’d like to, click Publish. You can come back and edit this Testimonial any time.
If you’d like, go ahead and add several Testimonials now. Or if you’re ready to move on, continue to step 3 now.
Step 3: Add your testimonial to your website!
Once you’ve added your first Testimonial, you’ll want to display it on your website!
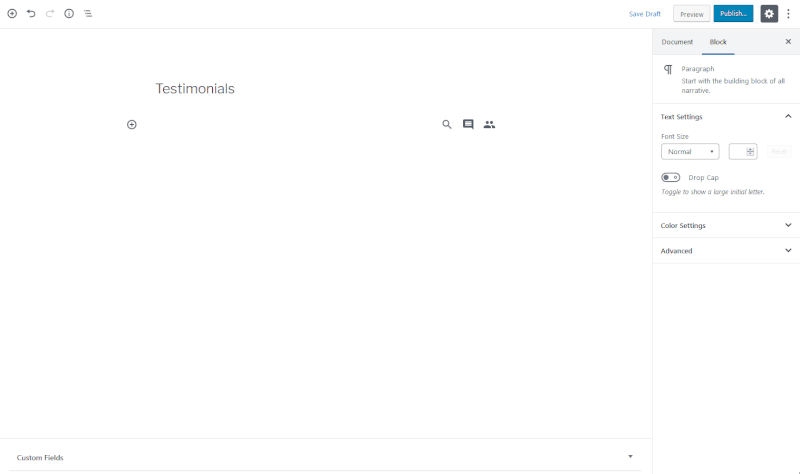
If you’re using the latest version of WordPress (at least WordPress 5), you can simply add a new Single Testimonial block to any Page or Post. Just click the plus (+) button to add a new block, and then select the Single Testimonial block from the Easy Testimonials menu.
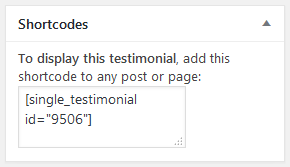
If you’re using an older version of WordPress or the Classic Editor, you can use shortcodes instead.
Simply look for the Shortcodes meta box, and copy the shortcode for this Testimonial. Then paste this shortcode into any page or post, and your Testimonial will appear in that location.
You can also add Testimonials by using our editor buttons (look for the new Testimonials menu when you edit your Pages and Posts), or using the Easy Testimonials widgets (found under the Appearance » Widgets menu).
In addition to displaying your Testimonials individually, you can also display them in a list, a grid, in a rotating carousel, or many other formats.
You’ll find custom blocks in the Gutenberg editor and editor buttons in the Classic Editor for all of these functions.
Read more about displaying your testimonials in these other formats here.